I Thawed it would be easy
Editor: Randy Cousins
Date: 2025-04-17
I was always fascinated with how curling ice was made, and I thought to satisfy my curiosity what better way to understand the process then to volunteer to take the ice out. What a treat that was. It’s hard to put into words, but I’ll start with one…. MESSY!
That's a wrap!
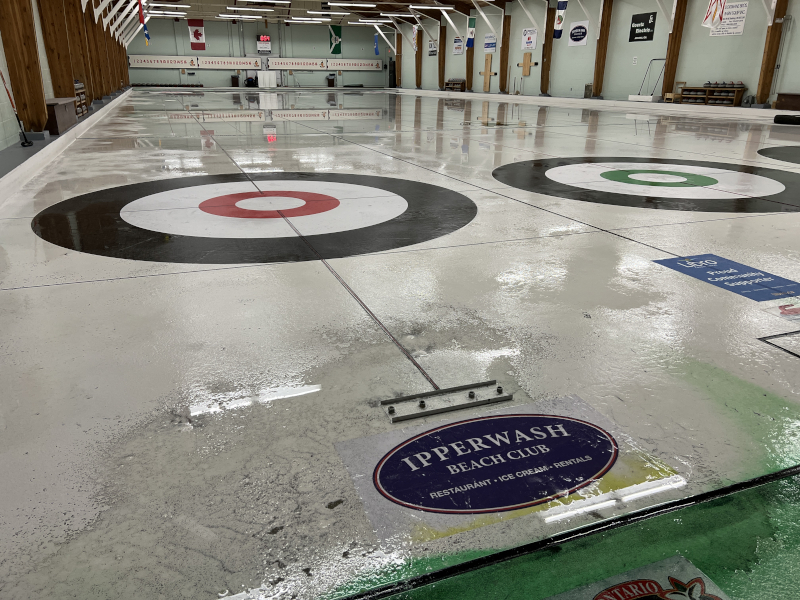
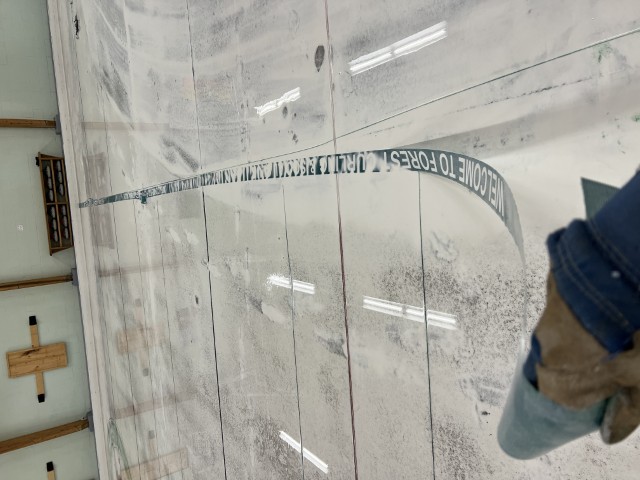
From what I’ve seen taking the ice out, it’s really atwo-step process. There is the base layer of ice that has to go in then it is painted. Then the logos go in. All the graphics on the ice are essentially just vinyl screen. Everything is laid very carefully and measured and hit with a fine layer of mist to freeze it to the ice. The house and all the stripes are actually Just vinyl tape along with the ad advertisements.
The centre line going down the middle of the ice is yarn. It’s actually quite simple when you see it for what it is. Now that I’ve gone through the process of dismantling this frozen "work of art" I really begin to appreciate how things take shape. Speed, curl, durability and air temperature (for player comfort) standards must come from the top down. Graeme, our club's ice technician is responsible for maintaining our club's ice high standards throughout the season. In order to achieve this high level standard, the ice must be maintained using some basic maintenance techniques. Our ice isscraped daily to remove the pebble from earlier games. A proper scrape is essential to completely removes the old pebble so new pebble can be applied. In many clubs, the ice is either not scraped daily or under-scraped. It's a real science!
Slurry Up!
I remember a couple years back my cousin calling me and bragging about how we help put the ice in at the Ingersoll curling club. I thought to myself surely I can top that. I mean, how hard can it be to take the ice out? It can’t be that much harder than putting nice in right. One thing I didn’t appreciate... until now of course, is how much paint is actually used on the curling sheets. I don’t know why, but for some reason, there’s a tendency to think that frozen water should naturally be white, but I can assure you it isn’t. It requires a lot of paint, a serious amount of paint!
One thing I wasn’t expecting is that it actually takes a considerable amount of time for the ice to melt, which really surprised me. There’s not a lot of ice, but what’s there seems to take over a week to thaw. Trust me I know, it’s all over my rubber boots and jeans. I have been assured that it does come off relatively easy, I guess we’ll find out.
Full House!
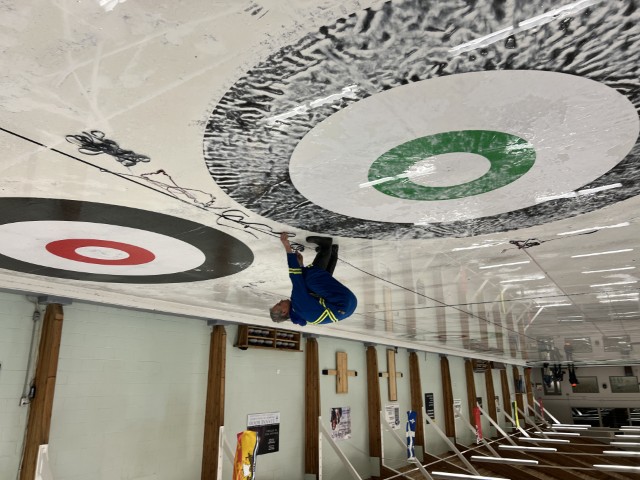
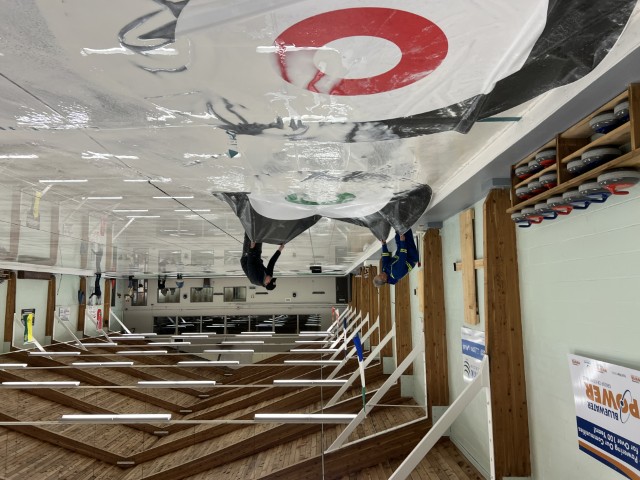
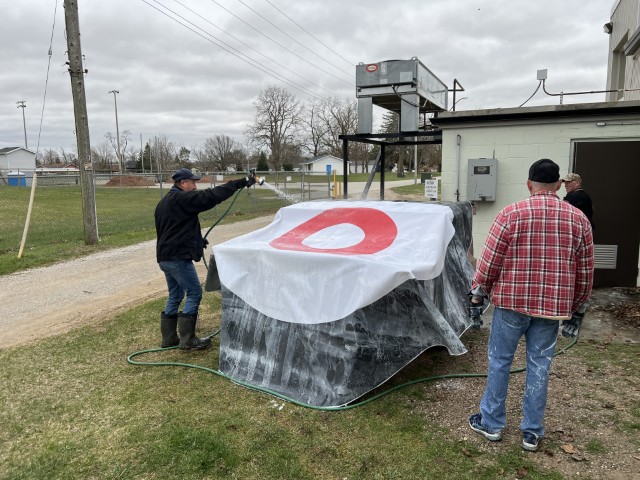
All of the graphics, that is to say "the vinyl", has to come off the ice and of course is also covered in slurry which needs to be washed off and hung up to dry. With enough hands, the process is actually pretty straightforward. Just a lot of rinse and repeat.
After a couple of hours, we did manage to get the graphics and everything off of the ice surface and now the process begins squeegeeing what has thawed out the door outside. At this point, it’s really just a messy slurry. First the slurry layer than all of the markings house and advertisements come up then the base layer.
Hold the line!
After going through the process of taking the ice out, I can hardly wait till the fall when we have to reverse the entire process and put it all back again. I’m getting a greater understanding and appreciation for the skill level required to make curling ice. Marking and laying it all out has to be incredibly precise.
Be sure to check out our galleries for more photos!
It’s actually quite fascinating…and did I mention, it’s quite messy!
 About Us
Established in 1884, the Forest Curling and Social Club has been dedicated to providing the best possible ice conditions and social environment at a reasonable cost for all members.
With four sheets we strive to provide great casual and competitive curling opportunities to people of all ages and abilities through house leagues and bonspiels...more info
|